नोट
How to draw a fairy cottage
Welcome! Imagine yourself as an architect tasked with designing a tiny home for a fairy or another small woodland creature.
Maya Scott
लेखक
मेटा
संदर्भ फील्ड नीचे उपलब्ध।
टाइप
पल्स नोट
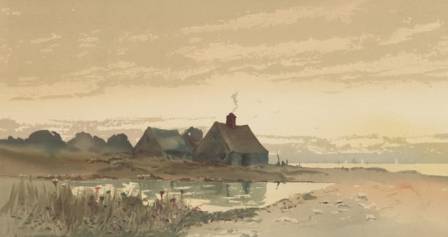
Welcome! Imagine yourself as an architect tasked with designing a tiny home for a fairy or another small woodland creature.
This guide walks you through creating a mix-and-match fairy cottage. It’s flexible and encourages artists to add their own details. Each cottage can be entirely unique—let your imagination run wild!
For educators: Scroll down to find this lesson ready for classroom use, complete with printable drawing guides.*
Materials
You can create this drawing with a variety of art supplies. Here are some ideas:
A shaded pencil drawing on plain white paper
Drawing on black or brown paper and adding pastels for color (Canson XL Series Black Drawing Paper works well) #sponsored
Sketching in pencil, then tracing with a sharpie and adding color with any medium you like
Light pencil lines, then watercolor to bring the cottage to life
Digital rendering! Check out free web-based drawing programs to create your fairy cottage
Example: a finished fairy cottage on beige paper, colored with brown marker and brown colored pencil for a rustic, sepia feel
BEFORE YOU BEGIN
Think about the scale of your cottage relative to its environment. Scale is the size relationship between objects in your artwork. Your cottage might be tiny compared to nearby flowers or tree trunks—use oversized surroundings to show perspective.

START WITH A LIGHT PENCIL SKETCH
No matter which medium you plan to finish with, start lightly with pencil. Draw gently until your design feels right.
STEP ONE: CHOOSE YOUR HOUSE
Will your fairy live in a rustic cabin, a giant mushroom, or even a teapot? Pick a style, or combine ideas to create something completely new. Don’t stress about perfectly straight lines—“wonky” lines add charm and whimsy to your fairy home.
STEP TWO: DESIGN THE DOOR
Pick a door style and add unique details: wooden frames, little lights, mailboxes, house numbers, windows, or whatever comes to mind. The door is a great place to show personality!
STEP THREE: ADD WINDOWS
Windows can be any style—mix and match! Consider shutters, curtains, or tiny items inside the windows like candles or potted plants. Windows give your cottage character and make it feel lived-in.
STEP FOUR: PERSONALIZE WITH NATURE
Now comes the fun part! Add natural elements and surroundings to your cottage. Decorate inside, outside, and all around. Think flowers, rocks, tiny paths, or woodland creatures—anything that makes your scene magical.
STEP FIVE: ADD TEXTURE
Bring surfaces to life with texture. Ideas include: wood grain, brick, cobblestones, shingles, grass, leaves, or any natural pattern. Texture helps your cottage feel real and adds visual interest.
FINAL TOUCHES
Once your fairy cottage is complete, finalize it with your chosen medium. Consider a light source to determine shadows and highlights, and suggest the time of day—sunset, nighttime, or morning. Let your creativity guide you and enjoy the process!

संबंधित

अपने स्वाद के लिए आदर्श फ्रोजन ट्रीट का चयन: एक पेशेवर गाइड

अपने वॉर्डरोब को परफेक्ट हैट से स्टाइल करें
स्टूडियो घिबली से प्रेरित 3डी पेपर शैडोबॉक्स बनाएं

2025 Summer Color Trends: From Soft Pastels to Bold Hues—How to Wear Them

समुद्री पक्षी क्या है?